
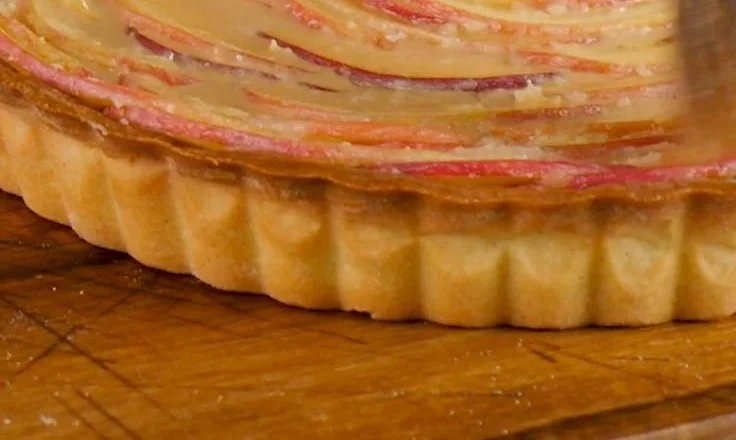
Salted Caramel Apple Tarts are a delightful treat, perfect for satisfying your sweet tooth and impressing your friends and family. With crispy tart shells, tender apple slices, and a luscious caramel drizzle, this recipe combines classic flavors into a comforting dessert that any beginner can master. It’s a wonderful way to celebrate the essence of fall or simply enjoy a bite of homemade goodness any time of year.

Why You’ll Love Salted Caramel Apple Tarts
-
Easy to Make: With pre-made tart dough and straightforward steps, this recipe allows even novice bakers to create a beautiful dessert with confidence.
-
Perfect for Any Occasion: These tarts are versatile enough for casual family dinners, festive gatherings, or as a sweet addition to holiday dessert tables.
-
Delicious Flavor Combination: The contrast of sweet caramel, tart apples, and a hint of sea salt creates a flavor profile that delights the palate.
-
Customizable: You can easily tweak this recipe by adding spices or experimenting with different apple varieties to suit your taste.
-
Makes for Great Leftovers: These tarts store well, so you can enjoy them over several days—a perfect make-ahead dessert!
Recipe Overview
- Prep Time: 20 minutes
- Cook Time: 30 minutes
- Total Time: 50 minutes
- Servings: 6 tarts
- Difficulty Level: Easy
Ingredients You’ll Need for Salted Caramel Apple Tarts
-
For the Tart Shells:
- 1 package of pre-made tart dough
-
For the Filling:
- 3 large apples (such as Granny Smith or Honeycrisp)
- 1 cup caramel sauce
- 1/2 teaspoon salt
- 1 tablespoon lemon juice
- 1 teaspoon cinnamon
-
For the Topping:
- 1 egg (for egg wash)
- Powdered sugar (for dusting, optional)
Note: Feel free to use your favorite caramel sauce or even make homemade caramel for a richer flavor.
How to Make Salted Caramel Apple Tarts
-
Preheat the Oven
Preheat your oven to 350°F (180°C). This temperature is ideal for baking the tart shells and ensuring the apples cook properly. -
Prepare the Tart Shells
Roll out the tart dough onto a lightly floured surface. Cut out circles that fit your tart pans. Gently press the dough into the pans and trim any excess edges. -
Prepare the Apples
Peel and core the apples, then slice them thinly. In a mixing bowl, toss the apple slices with lemon juice, cinnamon, and salt to prevent browning and enhance flavor. -
Arrange the Apples
Neatly arrange the apple slices in a rosette pattern within the prepared tart shells. This presentation not only looks beautiful but ensures each bite is filled with apple. -
Add the Caramel
Drizzle the caramel sauce generously over the arranged apples, allowing it to seep between the slices for extra flavor. -
Brush the Edges
Beat the egg in a small bowl and brush the edges of the tart dough with the egg wash. This will give the crust a golden, shiny finish. -
Bake the Tarts
Place the tarts in the preheated oven and bake for 25-30 minutes or until the apples are soft and the crust is golden brown. -
Cool and Dust
Once baked, allow the tarts to cool slightly before dusting with powdered sugar if desired. This adds an elegant touch that’s perfect for serving. -
Serve and Enjoy
Enjoy these tarts warm for the best flavor experience. They can also be served at room temperature.
Tips for Success
-
Choose the Right Apples: Use a mix of tart and sweet apples like Granny Smith and Honeycrisp for the best flavor balance.
-
Don’t Skip the Egg Wash: Brushing the edges with egg helps achieve a golden-brown color and seals the dough for a better texture.
-
Be Creative with Caramel: Try using flavored caramel sauces, such as sea salt caramel or vanilla, to add a unique twist.
-
Cut Apples Evenly: Aim for uniform slices when prepping your apples to ensure even cooking.
-
Check for Doneness: Don’t hesitate to check the tarts a few minutes before the suggested bake time to prevent overcooking.
Easy Variations
-
Nutty Crunch: Add a sprinkle of chopped pecans or walnuts atop the apples before baking for a delicious crunch.
-
Spiced Twist: Incorporate ginger or nutmeg along with the cinnamon for additional warmth and depth.
-
Dairy-Free Option: Use dairy-free caramel and replace the egg wash with a mixture of almond milk and maple syrup.
-
Adding Fruit: Mix in other fruits like pears or berries for a different flavor profile.
-
Single Large Tart: Instead of individual tarts, use a larger tart pan and arrange the apples in a circular pattern for a stunning centerpiece.
What to Serve with Salted Caramel Apple Tarts
-
Vanilla Ice Cream: The creaminess of vanilla ice cream perfectly complements the warm caramel and apples.
-
Whipped Cream: A dollop of lightly sweetened whipped cream adds a lightness that balances the richer elements of the tart.
-
Hot Coffee or Tea: These tarts pair wonderfully with a hot beverage, enhancing their comforting qualities.
-
Cheese Plate: A cheese board with sharp cheddar provides a savory contrast to the sweetness of the tart.
-
Chocolate Sauce: Drizzle some chocolate sauce on top for an indulgent dessert experience.
Storage and Reheating
-
Refrigerator Storage: Store any leftover tarts in an airtight container in the refrigerator for up to 3 days.
-
Freezer Storage: If you want to freeze them, wrap each tart individually in plastic wrap and then in aluminum foil. They can last for up to 2 months.
-
Best Reheating Method: Reheat in a 350°F (180°C) oven for about 10-15 minutes to restore the crispy texture.
-
Preserving Texture: Avoid reheating in the microwave, as this can make the crust soggy.
Common Mistakes to Avoid
-
Overbaking the Tart: Keeping a close eye while baking is key to avoid a tough crust or overly soft apples.
-
Using Wet Apples: Make sure to remove excess moisture from the apples by patting them dry with a paper towel before mixing with the lemon juice, cinnamon, and salt.
-
Skipping the Seasoning: Don’t overlook adding salt to the caramel; it enhances the flavors beautifully.
Salted Caramel Apple Tarts: Background & Cultural Inspiration
Salted caramel desserts have gained popularity in recent years, combining the sweetness of caramel with a tantalizing hint of salt. This pairing creates a complex flavor that enhances the natural sweetness of apples—an ingredient long revered in various cultures. Tarts are a European tradition, particularly in French pâtisserie, where they showcase seasonal fruits. Combining these influences results in a delightful treat that celebrates both heritage and contemporary tastes, making it a beloved choice for modern home bakers.
Frequently Asked Questions
Can I use homemade caramel sauce?
Absolutely! Homemade caramel can take your tarts to the next level, adding a personal touch.
What are the best apple varieties for this recipe?
Granny Smith and Honeycrisp are great choices for their balance of sweetness and tartness. Feel free to experiment with others like Fuji or Braeburn for different flavor profiles.
Can I freeze the uncooked tarts?
Yes, you can prepare the tarts and freeze them before baking. Just wrap them well and bake straight from the freezer, adding a few extra minutes to the bake time.
How do I ensure my tart shell is crisp?
Make sure your oven is fully preheated before baking, and consider blind baking the shells for a few minutes before adding the filling if you want an extra crispy crust.
Can I make these tarts ahead of time?
Yes, you can prepare the tarts, bake them, and store them in the fridge for a day. They’re best enjoyed fresh but will hold up for a day or two.
Final Thoughts
Salted Caramel Apple Tarts are not just a dessert; they represent warmth, comfort, and an opportunity to showcase seasonal ingredients beautifully. With their delightful combination of flavors and textures, these tarts make an inviting addition to any table. Give them a try, and you’ll find that they are not only simple to make but also incredibly rewarding. Whether you’re serving them to family or sharing them with friends, they are sure to leave a lasting impression. Happy baking!